My final project involves a lot of photoshop based work due to having to edit my photos vigorously, removing any flaws and blemishes to any extent, correcting the photo by adjusting colour balance, discolouration, brightness, hue, levels, curves, liquify etc. I am to my myself look like the models you see on the front of magazines. This experimental task will allow me to practice my photoshop skills before completing my final shoot and edits. It will give me the time to perfect any doubts I have about using the software and learn and develop any techniques I have not yet used before. I am going to use a couple image I had taken within my experimental self timer shoot to edit, this also gives me a chance to see what I will be working with as I will be editing myself again in my final images.
Step by Step: Retouching an Image
IMAGE 1:
Step 1:
I started off by making the background white instead of grey by using Levels under Image>Adjustments, I set it to Channel:RGB 0, 1.00, 255. I clicked around the white background using the white dropper tool to find the purest white without washing out my photo.


Step 2:
I used curves to adjust the colour of the the photo, I set it to Channel: RGB, Output: 143, Input: 138. This has helped with discolouration of my skin and with the colour of my clothes and hair.


Step 3;
I have no zoomed in to look at the photograph is closer detail, I see I have a few blemishes on my chest and want to get rid of them. To do so I have selected the spot healing brush tool to pick out each blemish and remove them. I have included a before and after shot of my chest area. Just by removing a few blemishes my skin already is starting to look flawless without any airbrushing or other editing.


Step 4:
To continue editing my chest area due to previous blemishes I have now used the Healing brush too to cancel out any possible marks I have made using the Spot healing brush tool, it will also help with discolouration. To use this tool use press the ALT key to select an area where you want to use the existing colour and then go over a similar coloured area to hide any extra blemishes. Before and after shots included.


Step 5:
I repeated the previous two steps of using the spot healing brush tool and healing brush tool but this time used a combination of the two tools on the face. You can see the complexion of my face is much smoother and clearer.


Step 6:
The liquify tool is a pretty big deal when it comes to post production editing in magazine industries. It is a way to create a false image, making models appearances look “flawless” when really they are just making it unrealistic. It creates an illusion that us as an audience are made to see and believe. This tool was quite fun to play around with especially as I was editing myself. I was able to make an “ideal” model version of myself. I cancelled out any extra fat around my face and made myself look slimmer. It gave me the option to change the size of the features on my face, which of course I had to have a go at. I still had to make myself look some what realistic and still look like a real person.


Step 7:
As I had made my face smaller and somewhat slimmer, the ear that is on show looked too big for my face! I had to change it and make it smaller using the forward warp tool within liquify. This tool allows you to move the picture around until you’re satisfied with the way it looks.


Step 8:
I used the forward warp tool within liquify to make my body look a little smaller, i took in my body from both sides to make it appear slimmer. I then used the pucker tool to make my head the equivalent size to my body along with my hands smaller too. Everything has to be proportionate to each other.


Step 9:
Due to the previous stay of using the liquify tool, The white background has moved along with it, to fix this I used the eyedropper tool to pick up the white background colour and then the paint brush to fill in the miss gaps.


Step 10:
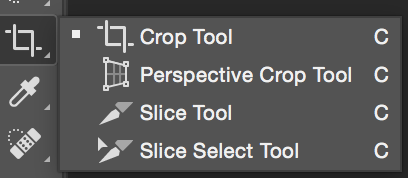
To finish off the image I cropped the bottom off using the cropping tool located on the side bar.


Before and After:
When I look at the difference between the before and after images, I feel like more work needs to be done to my face, the head in proportion to my body doesn’t look right, I can’t quite put my finger on what is wrong, it just doesn’t look completely right.


IMAGE 2:
Step 1:
For the second image I thought it would be quite fun to edit as I haven’t got a jacket on and I can play around with my body shape in liquify. For the first step I have adjusted the colour balance using levels. I set up the levels settings to Channel: RGB, Input Levels: 0, 1.00, 255. I clicked around the white background using the white dropper tool to find the purest white without washing out my photo.


Step 2:
I used curved under adjustments to adjust the colour in the image of my hair and skin. Channel: RGB, Output: 123, Input:114.


Step 3:
Where the skin was showing I used the spot healing brush tool to get rid of any blemishes and flaws. To do so I have selected the spot healing brush tool to pick out each blemish and remove them.


Step 4:
I then used the Healing tool to get rid of any discolouration or remaining blemishes left behind after using the spot healing brush tool. To use this tool use press the ALT key to select an area where you want to use the existing colour and then go over a similar coloured area to hide any extra blemishes. 


Step 5:
Now instead of moving my facial features around like I did in the previously retouching process, I am going to have a go at playing around with my body figure and how to try and make it look like the “ideal” “perfect” shape. I will enhance my curves and cinch in my wait to make it appear smaller and slimmer. To do this I will use the forward warp tool within the liquify tool.


Step 6:
The edges of my body are a little rough due to the folds in my clothes, to me this perfect I am going to smooth them out using the paint brush tool. I selected the area surrounding my body using the eyedropper tool to pick up the correct white, I then smoothed out the edged with the paint brush tool by going over the rough edges. This gave my body a smooth hour glass shape.


Step 7:
I felt like my hips looked a little too unrealistic and too big so I went back in with the forward warp tool and made them a bit smaller so they curved well with my stomach.


Step 8:
To make my arm proportionate to the rest of my body I used the forward warp tool once again to make my arms appear slimmer.


Step 9:
Due to the previous stay of using the liquify tool, The white background has moved along with it, to fix this I used the eyedropper tool to pick up the white background colour and then the paint brush to fill in the miss gaps.


Step 10:
To finish off the image I cropped the bottom off using the cropping tool located on the side bar.


Before and After:
I feel that this retouching experiment went a whole lot better, I was able to practice my skills from the previous retouch image experiment. I have successfully made my body into the “ideal” figure and will use this technique when I edit my images for my final shoot.


